How to Repair Small Holes in Drywall: Once you’ve got the basics down of “how to fix small holes in drywall,” you might be facing situations that take a little more finesse or specialized knowledge. Here are some advanced techniques, considerations for different wall textures, and repairing complex damage. We’ll also cover cost considerations for DIY versus professional repairs so that you know when to take on a project yourself and when to leave it to the pros.
More Advanced Techniques to Help Create Seamless Repairs
While the basic methods are straightforward enough, to get seamless results—on textured walls, for instance—is. So here are some advanced techniques that can help you put a final polish on your repair skills:
Blending with Textured Walls:
There’s extra work involved when repairing holes in textured walls. Once you’ve applied the patch and joint compound, you’ll need to texture the area to match the rest of the wall.
If you have a popcorn ceiling or other rough texture, apply a spray texture that matches after you’ve applied the joint compound. Spray the texture over the repair area, allow to dry, and then paint.
Knockdown textures, where the peaks of the texture are flattened a bit with a trowel after it partially dries, can be duplicated by working a similar process. As with all of these applications, practice on a scrap piece of drywall before doing it to your wall.
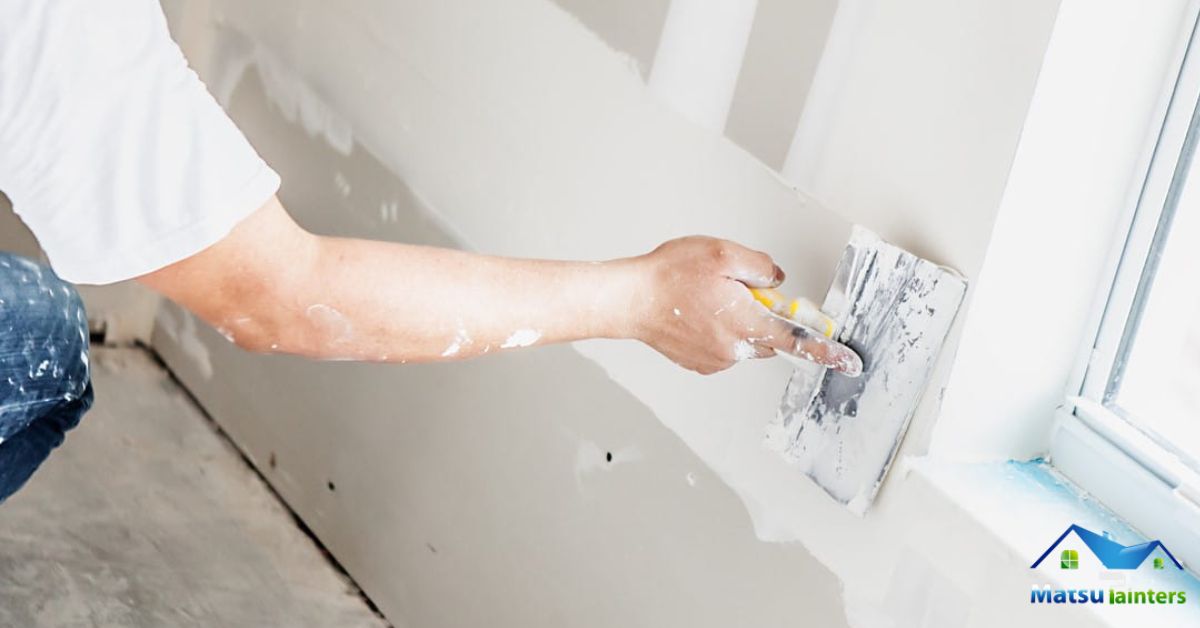
Invisible Seams:
This can even happen with small holes if the joint compound isn’t feathered out sufficiently. To avoid this, spread a wider area of joint compound and use progressively finer sandpaper to blend the edges seamlessly.
This helps: Wet the area slightly after sanding and before priming. This raises any dust that might have been created, settling into the tiny crevices, ensuring it’s all nice and smooth before painting.
High-Quality Primer and Paint:
Drywall repair, especially in high-visibility areas, requires a very good primer and paint. These stick better and will conceal the imperfections much better, matching your wall color more exactly.
If the area filled with filler remains faintly visible after one coat, do not be afraid to add a second or even third coat. Patience and meticulousness can go a long way in creating an awesome outcome.
Corner and Edge Repair:
Holes that are located near corners or edges of walls require additional special treatment. After the patch is in place, use a corner bead or drywall corner tool to aid in both reinforcing the repair and straightening lines of the wall.
When sanding, be careful not to round the corner. A block sander can be really useful for retaining sharp edges.
Dealing with More Complex Fixes
While this guide is primarily about the process of “how to repair small holes in drywall,” sometimes you will have more complex damage that calls for either additional steps or professional help.
Medium-Sized Holes:
For holes larger than 2 inches but smaller than 6 inches, you’ll want to use a drywall patch or a piece of drywall cut to the size of the hole. Fasten the patch with drywall screws, apply some joint compound over it, and let it go through the usual process of sanding, priming, and painting.
With larger holes, square or rectangle cutouts of the damaged area are done so that it allows for a patch to be fitted easily. The patch is attached to the studs with screws and finished with a joint compound.
Cracks and Structural Damage:
If you see cracks radiating from the hole or other structural damage to the drywall, then it is more than just a simple hole. Most of the time, cracks signal a deeper problem almost hidden with foundation settlement or even framing troubles.
In such situations, it is wiser to seek the help of an expert to survey the scene and recommend the appropriate plan. Look to turn for a “drywall service near me” to find a local professional.
Damage Near Electrical Outlets or Plumbing:
If it’s near an electrical outlet, switch, or plumbing, you need to be a bit more careful with your repair. Don’t cut any wires or pipes, and you might shut off the power to the area or turn off the water to the area, just in case.
If you’re working with any electrical or plumbing components, it might be appropriate to involve a professional. Many drywall installation services have the skills necessary to ensure such scenarios are safely managed.
Cost Considerations: DIY vs. Professional Repair
As the decision on whether to go the DIY way in repairing small drywall holes or to let a professional do it comes into a person’s mind, cost becomes important. Here is what the two routes cost in absolute terms:
Patched Kits: These are pretty reasonably priced between $5 and $15, depending on the size and quality of the kit.
Joint Compound and Putty Knife: The joint compound comes in at an average price of $5-$10. A putty knife will run from $2 to $10.
Sandpaper: Fine-grit sandpaper usually comes in a pack, and this costs approximately $3 to $7.
Primer and Paint: In the case when you already have matching primer and paint for your wall, then basically that’s free. If not, then the cost will be around $10 to $30 for primer and $15 to $40 for paint.
Overall, a basic DIY repair may cost you anywhere from $25 to $75 for the materials if you have some of it on hand.
Professional Repair:
Having drywall installation services or even a “drywall service near me” coming out to repair a small hole often runs between $50 and $150 for a simple repair, which can depend on the severity of the repair and your location.
For multiple holes or damage to the underlying structure, the costs can easily rise to $200 or more.
While doing the repairs by yourself can be less expensive for small holes, a professional ensures that the finishes are seamless, especially for larger or more complicated projects.
Environmental and Health Considerations
The drywall repair needs to be done while keeping the impact on the environment and health in view through the use of appropriate materials and methodologies. Some considerations have been enumerated as follows )”Low-VOC Materials:
Opt for low-VOC joint compound, primer, and paint to reduce indoor air pollution. These products are more environmentally friendly and cause less respiratory problems.
Control Dust:
Drywall sanding produces extremely fine dust, which is dangerous when inhaled. Always wear a dust mask to protect yourself, and use a vacuum or wet sanding to minimize dust.
If you have respiratory conditions or are sensitive to dust, consider hiring professionals who can control dust and debris more effectively.
Dealing with Waste:
Dispose of drywall wastes, including old drywall pieces, compound dust, and empty containers, in consideration of the local regulations. Some localities have specific disposal requirements for construction materials.
Final Thoughts
This is an extremely practical skill that can enhance the appearance of your home while saving you money on professional services. By following correctly all the steps in this guide and practicing the techniques discussed, you will be well on your way to mastering “how to repair small holes in drywall.”
Keep in mind that while most homeowners can tackle most of the DIY repairs on their own, sometimes it is just better to seek a professional, such as by searching for “drywall service near me” or drywall installation services. Whether you decide to tackle the project yourself or seek out a professional, knowing what to do and knowing all your choices will be very instrumental in getting you the best outcome possible for your home.