
Have you ever noticed those pesky little holes in your walls where you’ve hung pictures or shelves? You’re not alone! Almost every homeowner has faced this little dilemma at some point. Did you know that around 80% of people will need to repair nail holes in their homes? Thankfully, fixing them is easier than you might think! In this post, we’ll explore how to repair nail holes in drywall with nine simple tips. Whether you’re getting ready to paint your walls or just want them to look neat and tidy, we’ve got you covered. So, roll up your sleeves, and let’s dive in!
Why You Should Repair Nail Holes
Before we jump into the “how,” let’s talk about “why.” Here are a few good reasons to tackle those nail holes:
- Better Look: Nail holes can make your walls look worn out and messy. Fixing them helps keep your home looking fresh and well-cared for.
- Perfect for Painting: Planning to paint? You’ll definitely want to repair any holes first. Otherwise, the paint might not look smooth and could highlight those imperfections instead.
- Boost Your Home’s Value: A well-maintained home can attract buyers if you ever decide to sell. No one wants to walk into a home with visible flaws!
Now that you know why this is important, let’s get started with our top tips for repairing those nail holes.
Tip 1: Gather Your Supplies
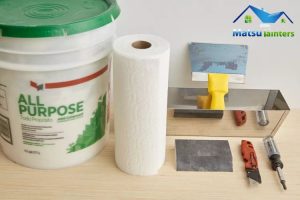
Before you begin, you’ll want to gather everything you need. Here’s a quick checklist to help you out:
- Spackle or Joint Compound: These are your go-to materials for filling holes.
- Putty Knife: Perfect for applying and smoothing out the compound.
- Sandpaper: Fine-grit works best for smoothing your patches.
- Primer and Paint: To finish the job and blend the repaired area with the rest of the wall.
- Cloth or Paper Towels: For any cleanup needed along the way.
Having everything at hand makes the process go much smoother!
Tip 2: Clean the Area
Before applying any compound, it’s essential to clean the area around the hole. Grab a damp cloth and wipe away any dust or debris. This step is crucial for ensuring that the spackle or joint compound sticks properly and creates a smooth surface.
Tip 3: Choose the Right Compound
Picking the right product is vital for a successful repair. For small nail holes, spackle is usually your best bet. It dries quickly and is super easy to work with. If you’re dealing with larger holes or deeper repairs, consider using joint compound, which is more durable and suitable for those kinds of fixes.
Quick Tips on Products:
- Fast-Setting Spackle: Great for quick repairs since it dries in about 30 minutes.
- Lightweight Joint Compound: Excellent for bigger patches, easy to work with, and gives a smooth finish.
Tip 4: Apply the Compound
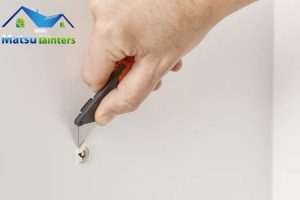
Now, let’s get to the fun part—applying the compound! Using your putty knife, scoop up a little bit of spackle or joint compound. Press it directly into the hole, making sure to fill it completely. Use the knife to smooth it out and feather the edges so it blends in with the wall.
Quick Tip for Small Nail Holes:
When you’re figuring out how to fill holes in drywall, just remember to cover the hole entirely and smooth out the surface.
Tip 5: Allow it to Dry
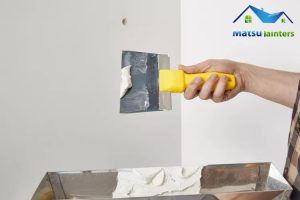
Once you’ve applied the compound, it’s time to let it dry. Drying times can vary, so check the product instructions. Typically, spackle dries pretty fast—within about 30 minutes to an hour—while joint compound might take a few hours.
Pro Tip:
Patience is key here! Allowing the compound to dry thoroughly will give you the best results.
Tip 6: Sand the Surface
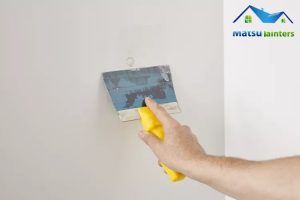
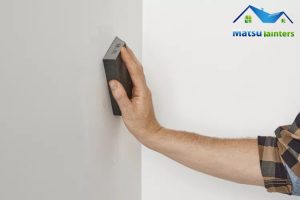
After the compound is fully dry, take your fine-grit sandpaper and gently sand the patched area until it’s smooth. Be careful not to sand too much; you just want it to be even with the surrounding wall. A light touch goes a long way!
Sanding Tip:
Use a sanding block or sponge to keep pressure even and avoid damaging the drywall.
Tip 7: Prime the Patch
Next up, it’s time to prime! Applying primer to the patched area seals it and ensures the paint goes on smoothly. Use a small brush or roller to apply primer over the patch, extending a bit beyond the edges.
Why is Primer Important?
Without primer, the paint might not adhere well and could end up looking uneven, which we definitely want to avoid!
Tip 8: Paint the Wall

Now for the finishing touch—painting! Grab the paint that matches your wall color and apply at least two thin coats, letting each coat dry completely before adding the next.
Quick Painting Tip:
If you have leftover paint from your last project, use it! If not, take a sample to your local paint store for a perfect match.
Tip 9: Clean Up

After your final coat of paint has dried, it’s cleanup time! Remove drop cloths, toss out empty containers, and wash your tools. A few minutes of tidying up will leave your workspace looking great!
Maintenance Tip:
Regularly check your walls for any new nail holes or wear. Tackling these issues early will make future repairs easier!
Bonus: How to Patch Screw Holes in Drywall
If you find yourself dealing with screw holes instead of nail holes, don’t worry—the process is quite similar. Here’s a quick rundown on how to patch screw holes in drywall:
- Clean the Area: Just like with nail holes, wipe away any dust.
- Apply Compound: Fill the screw hole with spackle or joint compound, pressing it in firmly.
- Smooth and Sand: Once it’s dry, sand it smooth.
- Prime and Paint: Finish up by priming and painting the area.
Quick Note on Filling Screw Holes:
If you’re curious about how to fill screw holes in the wall, just make sure to apply the compound carefully to achieve a seamless look.
How to Fix Screw Holes in Drywall:
Following these steps will ensure those pesky screw holes disappear quickly and easily!
FAQs
How big of a hole can you spackle?
Spackle is perfect for small to medium holes—generally up to about 1/2 inch in diameter. For larger holes, like those made by doorknobs, it’s best to use joint compound or a patching kit instead.
How do you fix a deep screw hole in drywall?
For deeper screw holes, follow these steps:
- Clean the Area: Clear out any loose debris.
- Use a Backer: If the hole is too deep, insert a piece of cardboard or a thin wood strip behind it for support.
- Apply Joint Compound: Fill it with joint compound, smoothing it out.
- Dry, Sand, and Paint: Let it dry completely, sand it smooth, and then paint over it.
What’s the difference between drywall compound and spackle?
Spackle is lighter and dries quicker, making it great for small repairs. Joint compound is thicker and takes longer to dry but is better for larger repairs and taping seams. Choosing the right product depends on the size and type of hole you’re fixing.
Conclusion
Repairing nail holes in drywall is a quick and rewarding project that can make a big difference in the appearance of your home. With these nine tips, you can confidently tackle those holes and make your walls look brand new!
For homeowners in the Matsu area, Matsu Painters is here to help with all your maintenance needs. Whether you need drywall repairs, help with electrical work, or assistance with painting. Our experienced professionals are just a call away.
If you found this guide helpful, we’d love to hear from you! Don’t hesitate to reach out for more tips or assistance, and check out our other posts for more home maintenance advice. Happy repairing!
